
Today is the day…. making sandwich bread from scratch.

You can do it!
Be bold.
Don’t let yeast intimidate you.

This sandwich bread is what’s on the other side – and it’s perfect for lunches for your kiddos, or for you too!

Top 5 Tips for Making Bread from Scratch
(1) Follow these simple yeast tips
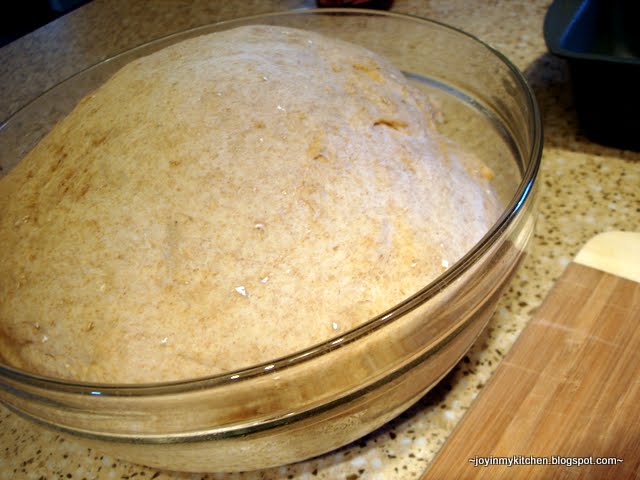
(2) Don’t worry too much about the shape of the loaf – practice will lead to better looking loaves. {see my earlier photos as evidence of this}
(3) Have a loaf pan (or two) that is roughly 4 1/2 x 8 1/2 inches.
(4) Plan for time … you’ll need about 3 hours from start to finish
(5) If you have one, use your bread machine to make the dough – bake the bread in your oven.
Our Favorite Bread Recipes
  |   |  |
 |  |  |
Simple Whole Wheat Sandwich Bread Recipe
This is the bread I grew up eating as a child. I have fond memories of the delicious smell of fresh-baked bread wafting through my parents’ rambler. Lovely. The bread makes a wonderful breakfast bread – delicious with toast & jam, a great sandwich bread, and goes great with that pot of soup for dinner.
Mom’s Whole Wheat Sandwich Bread – Makes 2 loaves
{Note: If using a “Classic” Kitchen Aid Mixer to make dough, half the recipe!}
Ingredients
- 4 C white whole wheat flour
- 3 C whole wheat flour (or more white whole wheat)
- 3 tsp. salt
- 1/3 C honey
- 2 1/4 tsp. yeast (1 pkg instant yeast)
- 2 3/4 C warm water (120 degrees F)
- 1/4 C olive oil
- {Optional: 1/4 C vital wheat gluten}
Directions
Begin by mixing the 2 3/4 C warm water (120 degrees F – check temperature with a meat thermometer), and 2 1/4 tsp. yeast together in a large bowl. I typically do this in the bowl of my kitchen aid mixer, but you can also do it in a measuring cup.

Allow the yeast and warm water to sit for 2-3 minutes. During the time the yeast should start smelling “yeasty” and bubbles should begin to form. If not – wait about 5 minutes. If you still aren’t seeing this reaction take place, dump the yeast & water and start again.
Next, you’ll add the goods that feed the yeast and help it metabolize so that it can produce carbon dioxide which helps your bread rise. To do so, sugar, salt and fat are essential.
Add in 1/4 C olive oil, 1/3 C honey (make sure you spray the measuring cup for easy honey removal), and 3 tsp. salt.

Slowly, now – 1 C of flour at at time, add in the flour (totaling 7 C) while you, or your stand mixer stirs the dough using the dough hook. Continue this process until all the flour is incorporated.

Using the mixer, knead the dough on the lowest 1-2 speeds (follow instructions for your mixer) for about 5 minutes, until dough is smooth & elastic.
If you are kneading dough by hand – check out my friend Laura’s great tutorial video on kneading bread. She’s an expert and shows you just how it’s done.

Shape the dough into a ball. Lightly grease your mixing bowl, or another large bowl. Then, place the dough ball into that bowl. Cover with a tea towel or plastic wrap.

Cover and allow the dough to rise for about 1 hour – or until doubled in size.
Using your fist, punch the center of the dough down (this is important to release some of the CO2 bubbles that contributed to the rise of your bread the first time around). Then, divide the dough into two halves.
Shape each half into a loaf – you can either just plop the dough into the greased bread pan and push the sides down to form the loaf (that’s what I often do – like for this wheat buttermilk bread recipe).

Or – roll the dough flat out, and then roll up the dough to form the loaf.

Place the loaves into lightly greased bread pans.
Cover with the tea towel again and allow the bread to rise for 30-60 minutes. At this point, the dough has risen enough when it’s about 1 inch above the sides of the bread pan in the center. Don’t allow the bread to over-rise – if it does, it will likely have a hole in the middle from the extra gas, or the top of the loaf will collapse. If either happens – oh well! Live & learn.
Bake the loaves in an oven, preheated to 375 F, for 30-35 minutes. At this point the bread should be lightly browned on the outside, and should sound hollow when you tap the top lightly.

Remove the bread from the oven, and after 2 minutes, carefully remove the bread loaves from the bread pan and transfer them onto a cooling rack to finish cooling completely.
Although tempting… cool completely (okay – cool mostly) before slicing.

Now I want to know… have you made bread from scratch before? Will you do it again? Any tips you have to share with us? Leave a comment below!

What brand of yeast do you use? Thanks.
ReplyDelete@ The Towers Family -
ReplyDeleteWe buy Instant Yeast from Fleischmann's in bulk from Costco/Sam's Club.
You can find a link to our package here -- (http://www.samsclub.com/sams/shop/product.jsp?productId=164800)
Thank you for this lovely recipe along with your detailed instructions. I've been making our bread using the bread machine but would like to make some sucessful loaves by hand. I'll be trying your recipe today using Spelt Flour. I will reduce the liquid 1/4 cup as this flour readily absorbs liquid and requires less kneadig as well. Wish me luck :)
ReplyDeleteYour bread looks gorgeous! Thanks so much for sharing your tips. :)
ReplyDeleteFor sandwich bread, we really love using dough conditioners / dough enhancer (one of which would be the gluten you include in your recipe)! :) It really does make the bread stay soft for several days (or more) so a sandwich can be eaten without the bread crumbling everywhere. :)
Another tip I can think of is to freeze bread as soon as it cools, and then take out as needed, so it's softer/fresher. :)
gorgeous loaf of bread! I just recently bought a bosch mixer (something to put on your wish list after your family grows. =0) I have 4 kids and they love my homemade bread. I do too, but now making it all the time. I bought this awesome loaf pan (it is basically 2 loaves. It is a 12in bread pan!) and it keeps me sane and baking more than bread for the week. =0)
ReplyDeleteHere's a link:
http://www.amazon.com/Norpro-Inch-Nonstick-Bread-Pan/dp/B000SSS4CA/ref=sr_1_6?ie=UTF8&qid=1318950019&sr=8-6
I love homemade bread! I've made bread for years and have made all our sandwich bread for the last five years or so.
ReplyDeleteYour bread is beautiful!! We have been making bread a lot more lately. We use it a lot to pair with a meal, but not as much for sandwiches. I might try your recipe. I have one similar that we love, but I'm always up for trying new ones!
ReplyDeleteWilla
www.armstrongfamilyfare.com
I love homemade bread!
ReplyDeleteI am in awe. Your bread loaf looks so professional. Wow! Makes me want to try!! I used to make bread when I was young and fearless. LOL!
ReplyDeleteI love making yeast bread, but often lately run out of time! Your picture of your sandwich had me hungry!
ReplyDeleteI can't wait to make this bread! I'm planning on making it this coming Sunday (yes, SuperBowl Sunday I'm going to be baking). But my confusion - I wanted a larger sandwich bread loaf, so I bought a 10x5 Calphalon loaf pan - this recipe calls for use of 1 or two 4.5" x 8.5" pans. Obviously I could halve the recipe, but then I'd end up with a smaller loaf, and I'd really like to get that nice rounded top you have in your pictures. Any suggestions on how to scale up (or down) to accommodate my larger pan, or where I could find a proper converter? Maybe remove just 1/4 of the dough before putting it in my loaf pan (and make rolls or something)? This is going to be my first attempt at sandwich bread, and I'd really love to not have too much or too little dough ruin the effort. Thanks in advance!
ReplyDeleteI would make the whole batch and then make rolls or bread sticks out of the remaining dough... I think that will be the safest bet! I've tried halving the recipe and it doesn't turn out as well, so I'd go ahead and make the whole thing... I think rolls would work well!
DeleteI love making homemade bread and plan to try this recipe soon, but my problem is slicing the bread. How do you get yours sliced so thin and evenly?
ReplyDeleteInvest is a good bread knife -- it makes all the difference in the world when slicing bread. I also try to slice the bread after it's cool, but before it has a tendency to dry. Typically, this means I cut the loaf 5-6 hours after baking. Then, I keep a few slices out and freeze the other slices, pulling out just what we need when we need it.
DeleteHow do you go about freezing home made bread?
ReplyDeleteHi Casey,
DeleteCheck out this link to my kitchen tip about freezing bread:
http://joyinmykitchen.blogspot.com/2013/04/kitchen-tip-keeping-homemade-bread-fresh.html
Hope it is helpful!
We ran out of bread for sandwiches this week, so I made this (trying to really keep to our budget) and they taste amazing!
ReplyDeleteI'm so glad you enjoyed it and that it helped you stay on budget!!
ReplyDelete