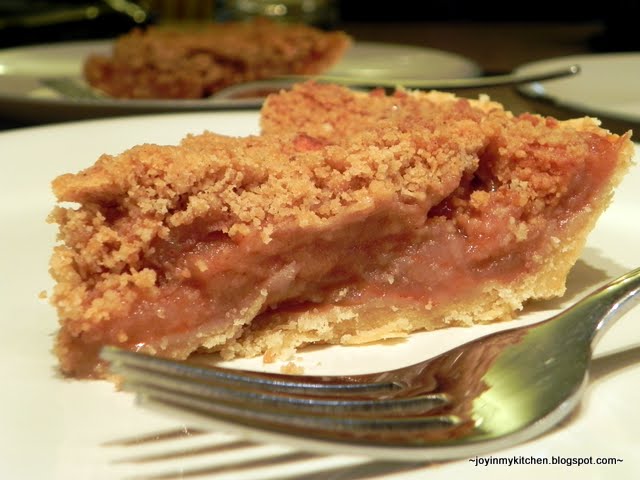
Day #2 of desserts that could grace your Thanksgiving table. Today, we’ll switch things up from the pumpkin ice cream I shared yesterday, and turn our thoughts towards apples.
Apple Pie is one of our all-time favorite pies, in fact, it might be my favorite pie. But, the one thing I don’t like about making pies is making crust! While we do rely often on my grandmother’s no-fail pie crust recipe, sometimes I’m just too plain lazy to make that recipe.
This apple pie with crumble topping is the perfect solution. The crust is a crumble and press variety, and there is no need to fuss with a top crust either.
We made these pies earlier this fall and still have a couple in our freezer.
If you’re thinking of having apple pie next week, make one of these up this week and freeze it until next Thursday! You’ll simplify your prep next week and your family & guests will love this pie.
Apple Pie with Crumble Topping – Adapted from Life as a Mom
Ingredients
- 2 C white whole wheat flour, divided
- 1 stick of butter, divided
- 1/2 tsp. sea salt
- 1-2 T cold water
- 8 medium apples – preferably Haralson & Regent
- 1/4 C (slightly heaping) sugar
- 2-4 tsp. cinnamon
- 1/2 tsp. nutmeg
- 1/2 C brown sugar
- 1/2 C oats (optional)
Begin by combining 2/3 of a stick of butter butter, at room temperature or slightly softened, with 1 C white whole wheat flour and 1/2 tsp. sea salt. Mix until clumps form, then add 1-2 T cold water to the mixture and stir until dough forms a nice clump.

Divide the dough in half, and press each half into a pie plate (8 or 9 inch is fine). If desired, shape an edge on the pie.

Note the ease of pressing the pie crust rather than rolling… ahhh.

Meanwhile, slice, peel and core the apples. We LOVE the combo of Regent & Haralson. Can’t go wrong there.

Stir in the 1/4 C sugar, 2-4 tsp. cinnamon (depending on how much cinnamon you enjoy), and 1/2 tsp. nutmeg.
Divide the apples evenly into the two pie plates.

Then, melt the remaining 1/3 stick of butter. If desired, you can use up to 1/2 C butter to make a really buttery topping. Combine that with the remaining 1 C flour, and 1/2 C brown sugar. Stir until small crumbs form.

Top each pie with half of the crumb mixture.

Using your hand, lightly press the crumb mix into the apples to get it to stick a bit. Then, either bake directly or freeze.

Freezer Directions
Place the pies into an airtight freezer bag. Clearly label the bag with: Apple Pie & the date, along with cooking instructions.

When you remove the pie from the freezer, place it onto a cookie sheet and place it frozen right into an oven preheated to 425.
Bake at 425 for 15 minutes, then reduce the heat to 375 and continue baking for an additional 45 minutes to 1 hour until the pie is bubbly and crumbs are slightly browned.
Baking Immediately
Place the pie onto a cookie sheet and place into an oven heated to 375 degrees F. Bake the pie for 45 minutes – 1 hour, or until the pie is bubbly and crumbs are slightly browned.

In both instances, either baking immediately or freezing to bake for later, it’s important to let the pie sit after baking for 30 minutes – 1 hour. This will help the apples to set and give you an amazing final product.
Linked to: These Chicks Cooked, Recipe Linky


Ha! I just wrote up this recipe last night to post soon. A friend sent it to me and I was really pleased with it. I made 3 of them in round dishes like you did, froze them, and served them at a bridal shower several weeks later. I also made extra of the filling and froze it as well so that i can pull it out and only have the crust to make. Everyone really enjoyed it; I served it with apple cider. Mmm! Looks like we are on the same wavelength today! :)
ReplyDeleteoops, I should mention that i cooked mine completely and then froze it. then, just thawed it out to be served. it was fantastic this way.
ReplyDeleteI'll be dropping by for some yummy apple pie soon! Actually, I just stopped in from SITS to say hi; hope you will find time to do the same.
ReplyDeleteYum! I love crumble toppings! It's my favorite part!
ReplyDeleteDelightful, number one pie on my list.
ReplyDeleteOh Yum! Looks delicious and I love the frezer idea!!
ReplyDelete