Showing posts with label Zucchini. Show all posts

Thursday, September 17, 2015

Zucchini, Ham and Rice Casserole

We have a few abnormally large zucchini fruits from our garden.  Oops!  It’s been hard to keep out the garden with our 7.5 month old Little Chef this summer, but we’ve sure tried. 

IMG_6206

When we do get out there to harvest, we often find overgrown zucchini.  This recipe was perfect for using them up! 

IMG_6208

Zucchini, Ham and Rice Casserole – Adapted from Roxana’s Home Baking

Ingredients

  • 3 eggs
  • 1/2 C ham, diced
  • 1 medium red bell pepper, diced
  • 1 large zucchini, shredded
  • 1/2 tsp. minced garlic
  • 2 C cottage cheese
  • 3/4 C minute brown rice, uncooked
  • 6 slices cheddar cheese
  • salt and pepper, to taste

Directions

Begin by combining the shredded zucchini, diced bell pepper, minced garlic, eggs, salt and pepper in a large bowl.  Stir well. 

IMG_6203

Add in the diced ham, 2 C cottage cheese and 3/4 C minute rice.  Stir to combine.

IMG_6205 

Pour the mixture into a lightly greased 9x13 glass baking dish.  Top with 6 slices of cheddar cheese. 

IMG_6207

Bake at 350 for 40-45 minutes, until cooked through.  Serve warm.  Enjoy!

IMG_6206

Tuesday, August 18, 2015

Grilled Pork with Corn & Zucchini Salad

This dinner is simple and easy, yet the flavors combination is outstanding.  The salad pairs perfectly well with a yummy grilled pork chop.  It’s fast and easy, but fancy enough to serve for company! 

Grilled Pork with Corn & Zucchini Salad

Ingredients

  • 4 pork chops, boneless
  • Montreal Steak Seasoning
  • 1 medium zucchini, quartered
  • 1 large cob of sweet corn
  • 1 sweet Vidalia onion
  • 1 C cherry tomatoes
  • 1 T olive oil
  • Salt and pepper, to taste

Directions

Begin by seasoning the pork chops with Montreal steak seasoning and placing them on a grill over medium heat.  Cook, flipping occasionally, until internal temperature of the pork reaches 170 degrees. 

Meanwhile, cut the corn off the cob and toss with chopped onions, quartered zucchini and cherry tomatoes in 1 T olive oil.  Season with salt and pepper, as desired. 

Arrange the veggies on a foil-lined grill pan (alternatively you could roast these at 450 in the oven for 30 minutes). 

Place the pan on the grill and grill for 20ish minutes until the zucchini and onions are tender.  Serve alongside the pork chops. 

Enjoy!

Wednesday, July 29, 2015

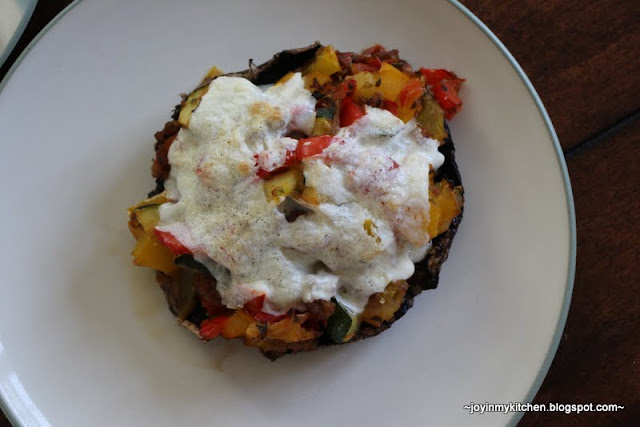
Veggie Stuffed Mushrooms

Veggie Stuffed Mushrooms

Ingredients

  • 1 medium zucchini, quartered
  • 2 bell peppers, diced into 1/2 inch pieces
  • 1 C cherry tomatoes, quartered
  • 1/2 lb. ground Italian sausage
  • 1 T minced onion
  • 1/2 tsp. minced garlic
  • 1 tsp. basil
  • 1 tsp. oregano
  • 4 slices fresh mozzarella cheese
  • 4 portabella mushroom caps

Directions

Begin by washing the mushroom caps.  To do so, remove the stems, scrape out the gills and clean with a damp paper towel.  Place the mushroom caps facing upwards on a lightly greased cookie sheet.  Season with garlic, salt and pepper.  Then, bake at 400 for 5-10 minutes.  Remove from the oven and carefully scoop out the liquid pooling in the mushrooms. 

Meanwhile, brown the ground Italian sausage (we used turkey sausage) until cooked.  Add the diced zucchini, bell peppers and cook for 5-7 minutes until veggies are crisp tender.  Add the diced tomatoes in the last 2 minutes of cooking.  Season with basil and oregano. 

Fill each mushroom cap with the veggie filling. 

Top each with a slice of cheese and return to the oven, cooking for 10-12 minutes until the mushrooms are tender and the cheese is melted. 

Serve warm. 

Enjoy!

Friday, July 10, 2015

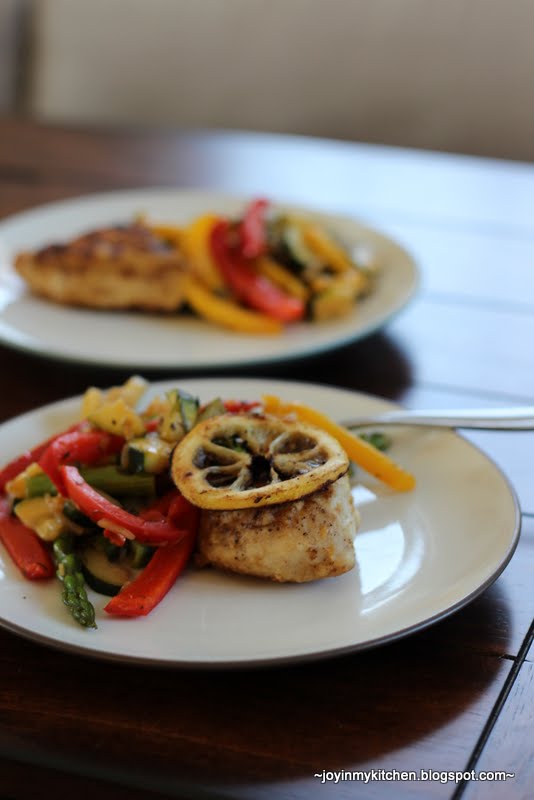
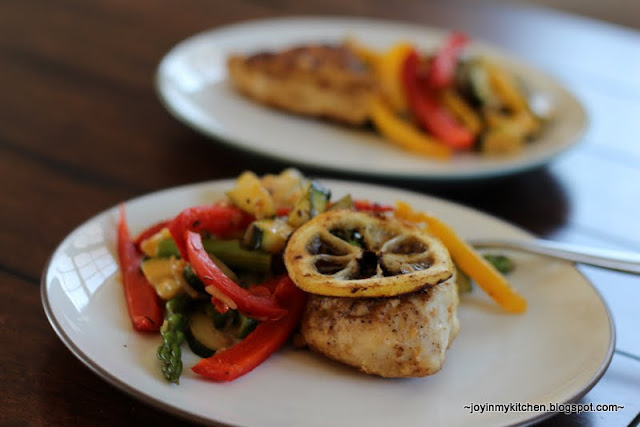
Lemon Skillet Chicken with Vegetables

If you are looking for a tasty and refreshing summer recipe that does not involve turning on your oven, than this is the recipe for you. 

Light and refreshing, this lemon crusted chicken skillet with tasty summer vegetables is sure to be a hit at your dinner table. 

Lemon Skillet Chicken with Vegetables – Adapted from Baked By Rachel

Ingredients

  • 1 recipe lemon butter sauce
  • 2 medium bell peppers, sliced into strips
  • 2 medium zucchini, quartered into 1-inch pieces
  • 8 stalks of asparagus, trimmed and cut into 1 inch pieces
  • 4 chicken breasts
  • 4 T flour
  • salt and pepper, dashes of each
  • 2 T lemon zest (an entire lemon)
  • 4 lemon slices
  • 1/2 T butter

Directions

Begin by combining 4 T flour with salt and pepper and lemon zest in a shallow bowl.  Add in the chicken breasts and coat well in the mixture. 

Melt 1/2 T butter in a large skillet over medium heat. 

Add in the coated chicken and cook over medium heat for 5 minutes and then flip over. 

Add the lemon slices and continue cooking until chicken temperature reaches 180 degrees. 

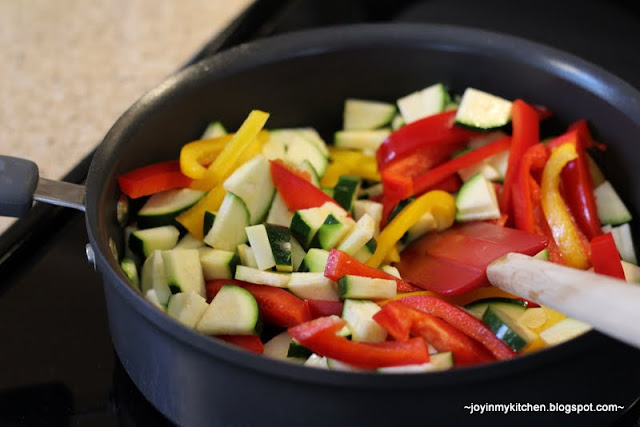
Meanwhile sauté the sliced veggies in a second skillet over medium heat.  If needed, drizzle with a little olive oil to sauté. 

Cook until crisp-tender and then add the herbed butter sauce. 

Serve veggies and lemon chicken topped with a lemon slice. 

Enjoy!

Tuesday, June 30, 2015

Summer Salad

Using bountiful and colorful summer produce makes this summer salad a real treat. 

The flavors are brought forth through a delicious roasting of veggies, and a splash of balsamic and maple syrup.  It’s a summer salad that is sure to become a tradition. 

Summer Salad – Adapted from Oh She Glows

Ingredients

  • 1 red bell pepper
  • 1 orange bell pepper
  • 1 can (14 oz) corn (or 3 cobs, fresh)
  • 1 zucchini
  • 1 summer squash
  • Olive oil, to taste
  • Sea salt, to taste
  • Pepper, to taste
  • 1 can (15oz) black beans, rinsed and drained
  • 1/4 tsp. minced garlic
  • 2 T balsamic vinegar
  • 1 tsp. olive oil
  • 1 tsp. maple syrup
  • 1 tsp. Dijon mustard
  • 1 tsp. dried parsley
  • Splash of lime juice, if desired

Directions

Begin by preparing the veggies – dice the squash, bell peppers, and zucchini into 1-inch cubes.  Then, remove the corn kernels from the cobs, or just use 1 can (14-15oz) of corn (rinsed and drained). 

Arrange all the veggies on a lightly greased tray (I sheet cake sized pan), and sprinkle with olive oil, salt and pepper. 

Roast the veggies at 425 for 15-20 minutes. 

Place the roasted veggies in a large bowl along with 1 can (15 oz) black beans (be sure to rinse and drain the beans!). 

Stir to combine. 

Then, combine together: olive oil, balsamic vinegar, garlic, parsley, maple syrup and Dijon mustard.  Stir well. 

Drizzle over the salad and stir to combine. 

Serve immediately while warm, or chill and serve cold.  You can eat it as a salad or with chips as a salsa. 

Bring on summer!

Tuesday, July 29, 2014

Summer Salsa

Two weeks ago my colleagues were in town for a conference in our field and I invited them over for dinner.  Since we had fresh zucchini from our garden, I decided to try a new salsa recipe to go along with the bratwurst. 

The salsa was extremely easy to make and prep the day before; it was great served with tortilla chips, but also as a stand-alone salad. 

Summer Salsa – Adapted from Good Life Eats

Ingredients

  • 1 (10-15oz) can corn, rinsed and drained
  • 2 medium zucchini, quartered
  • 1 (15oz) can black beans, rinsed and drained
  • 1 C diced cherry tomatoes
  • 1/2 tsp. minced garlic
  • Pinch of salt and pepper (to taste)
  • 2 T cider vinegar
  • 1 T red wine
  • Olive oil
  • Parsley

Directions

Arrange the corn and zucchini on a large lightly greased cookie sheet.  Spritz lightly with olive oil and season with salt and pepper. 

Roast in an oven heated to 425 degrees for 20-25 minutes until zucchini and corn are roasted.  During the last 10 minutes, add the diced cherry tomatoes and roast them as well.  Continue roasting until most all the juices are evaporated.

Meanwhile, mix together 1/2 tsp. minced garlic, 2 T cider vinegar and 1 T red wine.  Stir well and set aside. 

When the veggies are done, toss them, along with the black beans, into a large bowl.  Drizzle on the wine mixture and stir well.  Garnish with fresh or dried parsley. 

Serve warm or chilled alongside tortilla chips. 

Enjoy!

Tuesday, February 18, 2014

Turkey Meatballs in the Crockpot

If you have 15 minutes in the morning, you can have a filling dinner when you get home from work, allowing your crockpot to do all the work. 

We made these turkey meatballs last week and enjoyed them so very much.  Meatballs around here are a treat – heck, meat is a treat around here, especially in spaghetti.  Typically, we load our marinara sauce with veggies and if we do want meat, we toss it in as a garnish.  But, these meatballs – wow.  Definitely stole the show. 

We reserved the leftovers for a meatball sub casserole.  I can’t wait to share that recipe with you. 

Turkey Meatballs in the Crockpot

Ingredients

  • 1 recipe quick spaghetti sauce (skip the meat)
  • Whole wheat spaghetti noodles (we love Healthy Harvest)
  • 1 medium zucchini (or summer squash), shredded
  • 1/2  tsp. minced garlic, divided
  • 1 C spinach (fresh or frozen, torn)
  • 1/3 C Panko bread crumbs
  • 1/3 C shredded Parmesan cheese
  • salt & pepper
  • 1 egg
  • 1 lb. extra lean ground turkey

Directions

Get your crockpot all set up and ready to go. Lightly grease the bottom and sides with olive oil.  

In a large bowl, combine together 1 lb. ground turkey with shredded zucchini, 1/2 tsp. minced garlic, 1 C spinach, 1/3 C Panko bread crumbs and 1/3 C Parmesan cheese.  Mix together well. 

Add in 1 egg and salt and pepper and continue mixing.  I recommend using your hands here. 

Then, using a T cookie scoop or your hands, shape the meat mixture into fairly tightly packed meatballs about 1 T in size.  Place each in the bottom of the crockpot.  If you’d like, you can make the meatballs as large as 2 T in size. 

Arrange the meatballs carefully in the crockpot. {Note – I tried the meatballs with tomato sauce on the bottom of the crockpot and I wouldn’t recommend it.  So, just skip it, even though you can see it in the photo.} 

Place the lid on the top and cook on low for 8-10 hours or until meatballs have reached 180 degrees. 

In the last 20 minutes, prepare a batch of quick marinara sauce and boil up your pasta. 

Serve warm, topped with additional Parmesan cheese, if desired. 

Enjoy!

Tuesday, January 28, 2014

Italian Sausage Vegetable Chili Cheese Bread

This dinner is out of this world amazing. 

And, the crockpot does virtually all the work.  It’s perfect for a chilly winter night. 

Don’t let the cheese bread part of this recipe title fool you, it’s a hearty chili, that is perfectly tasty on its own.  But, if you want a real treat, serve it on that French bread.  Oh. My! 

Frog Prince and I ate every crumb. 

Italian Sausage Vegetable Chili Cheese Bread 

Ingredients

  • 1 loaf French Bread
  • Monterrey Jack Cheese, slices (1-2 per piece of bread)
  • 1/2 lb. ground Italian sausage
  • 4 medium bell peppers (green, red, yellow and orange)
  • 1 onion
  • 1 can diced tomatoes, undrained
  • 2 medium zucchini, quartered
  • 4 oz baby bella mushrooms, sliced
  • 2 T tomato paste
  • 1/2 tsp. dried minced garlic
  • 1 tsp. basil*
  • 1 tsp. oregano*
  • *Or, 2 tsp. Italian seasoning

Directions

Begin by browning the Italian sausage until cooked through.  Drain. 

Place the ground Italian sausage in the bottom of your crockpot. 

Slice the bell peppers into thin strips, and then cut them in half so you have 1/4 of an inch x 2 inch strips.  Quarter the onion and add that along with the bell peppers to the crockpot. 

Add in the quartered zucchini and sliced mushrooms. 

If you don’t like mushrooms, leave them out… but don’t let that keep you from making this delicious dinner. 

Add in 2 tsp. Italian seasoning, or 1 tsp. each – basil and oregano, and 1/2 tsp. dried minced garlic (about 3 cloves). 

Then, stir in the tomatoes. 

Cover and cook on low for 4-4.5 hours, until veggies are tender.   

30 minutes before dinner, add in the 2 tsp. tomato paste and cover. 

Slice up the French bread and spritz lightly with olive oil, and sprinkle with garlic powder, if desired.  Toast the bread under the broiler for 1 minute, just so that the bread gets warmed and a little crunchy on the top. 

When the chili is ready, use a slotted spoon to scoop 1-2 spoonfuls of chili onto each piece of bread. 

Top with cheese slices. 

Return to the broiler for 2-3 minutes, watching carefully to be sure the cheese and bread does not burn. 

Serve warm.

Leftovers are great just as a standard chili or re-assembled into cheese bread.  It’s best to make up just what you plan to eat to keep the leftovers delicious. 

Related Posts Plugin for WordPress, Blogger...