Showing posts with label Bacon. Show all posts

Tuesday, September 23, 2014

Appletizer: Bacon-Wrapped Apples

Last night, our women’s ministry team had an appletizer (appetizers & desserts all featuring apples)!  It was our kick-off event for the year and featured delicious food and wonderful conversation. 

My contribution to the night was bacon-wrapped apples.  These little savory bites were a hit, and so easy to make. 

Not only were they great right away, the leftovers were fantastic on top of whole wheat waffles.  Yum! 

Bacon-Wrapped Apples

Ingredients

  • 4-6 large apples, Granny Smith or Honey Crisp Recommended
  • 1/2 lb. bacon

Directions

Peel and core the apples.  Slice each apple into wedges. 

Slice each strip of bacon into 6 strips.  Do this by first cutting the bacon strip in half, and then cutting each half into thirds, the long way. 

Wrap each strip of bacon around the apple slice.  Secure with a toothpick.

Bake at 375 for approximately 30-minutes, until the apples are softening and the bacon cooked. 

Enjoy warm. 

Friday, August 1, 2014

Breakfast Stuffed Portabella Mushrooms

Earlier this week, Frog Prince and I celebrated our 7th wedding anniversary.  For our special day, I decided to make us a new breakfast to enjoy together before we headed off to work. 

Not only was it easy to make, but it was delicious and the leftovers warmed up well! 

And, it looked kind of fancy too. 

Breakfast Stuffed Portabella Mushrooms

Ingredients

  • 4 portabella mushrooms
  • 4 eggs
  • Olive oil spray
  • 1/4 C diced bell pepper
  • 1/4 C diced zucchini {optional}
  • 2 strips of bacon, cooked and crumbled
  • 4 slices of cheddar cheese
  • 1 medium Roma tomato
  • salt & pepper

Directions

Begin by removing the stems from the mushrooms and carefully using a spoon to scoop out the gills of the mushrooms.  Then, wash the mushrooms and pat them dry.  Place them on a lightly greased cookie sheet, with the cap-side down.  Season them with a pinch of salt and pepper, and if desired, garlic. 

Roast the caps at 425 for 10-12 minutes.  You may wish to flip the mushrooms over once during that time frame; I typically do not, but I know folks who do. 

Carefully spoon the liquid out of the mushrooms after roasting.  If you are prepping the night before, stop here and place the roasted mushrooms in the refrigerator over night.  If you are making them right away, reduce your oven temperature to 375. 

Place diced bell pepper and optional zucchini into the center of each mushroom.  Add the crumbled bacon. 

Top each mushroom with an egg and a slice of cheese.  Season with salt and pepper, as needed.  Slice up the Roma tomato and place slices onto the lightly greased cookie sheet to roast. 

Bake the mushrooms for 15-20 minutes, until the eggs are set and the cheese is melted and slightly browned. 

Top each egg with 1-2 slices of roasted tomato, as desired. 

Serve warm, alongside hash browns. 

Enjoy!

Friday, June 6, 2014

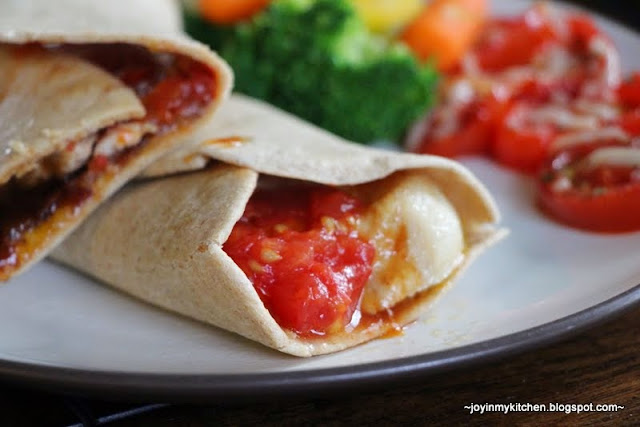
Monterrey Chicken Wraps

I find myself looking for lighter dinners to enjoy during the summer months when hot dishes and other heavy meals don’t go over as well. 

These chicken wraps are a new favorite. 

I’ve tried them on bread in a  grilled cheese of sorts, but somehow the wrap made the dinner just that much better for a summer. 

Monterrey Chicken Wraps

Ingredients

Directions

Begin by grilling or pan-searing the chicken tenders in olive oil.  If you have Smokehouse Maple seasoning, go ahead and season your chicken tenders with it; if not, just season it well with salt and pepper. 

When the chicken tenders have reached 180 degrees, place each in the center of a whole wheat tortilla.  Top with 1 strip of cooked bacon, a slice of extra sharp cheddar cheese, roasted tomato slices and top with BBQ sauce.  {note: you might want to melt the cheese on the tortilla first, if desired}

Roll up the tortilla and if needed, use a toothpick to hold the tortilla together if needed.  Slice in half to serve. 

Serve warm.  

Enjoy!

Tuesday, January 7, 2014

Recipe Make Over: Christmas Eggs Lightened Up

To kick off the new year, I wanted to share one of our favorite recipes lightened up.  This recipe comes from my husband’s family: Christmas Eggs.  Cheesy, bacon goodness made extra creamy with sour cream. 

This year for Christmas, I tried tweaking the recipe a bit (you always hate to do that with a family favorite) to see if I could make it a little better for you. 

We swapped Greek yogurt for sour cream, Canadian bacon for some of bacon, and used less but more flavorful cheese. 

We loved the result.  Still creamy and cheesy – a hearty and filling way to start the day.  You can easily double this recipe to feed 5+ people; this recipe feeds 4. 

Lightened Up Christmas Eggs – Adapted from FJiMK 

Ingredients

  • 6 eggs
  • 1/4 C milk
  • pinch of salt
  • dash of pepper
  • 1/8 tsp. parsley
  • 1/4 C plain non-fat Greek yogurt (we used Fage)
  • 2 strips of bacon
  • 3-4 pieces of Canadian bacon
  • 1/4 C extra sharp cheddar cheese

Directions

Lightly grease an 8x8 baking dish and a large skillet.  Whisk together 6 eggs and 1/4 C milk.  Mix in salt, pepper and parsley.  Cook eggs over medium heat until they are nicely scrambled and just about set.  You don’t want to overcook them and dry them out since this dish will later be baked. 

Stir in 1/4 C Greek yogurt, and then place the eggs in the bottom of the 8x8 prepared pan. 

Dice up the bacon and Canadian bacon into small bits.  Cook the bacon over medium-low heat until crunchy.  Drain and discard bacon grease.  Then, in the same skillet, fry up the Canadian bacon pieces. 

Top the eggs with the bacon and Canadian bacon crumbles. 

Cool to room temperature and cover; refrigerate overnight if you plan to  make the eggs in the morning.  If not, continue on in the instructions. 

Top the eggs with shredded extra sharp cheddar cheese. 

Then, bake at 300 degrees for 15-20 minutes until warmed and cheese is melted.  If you are baking the dish in the morning, place the dish in an non-preheated oven and bake following the above directions. 

Serve warm. 

Tuesday, August 20, 2013

Breakfast Stuffed Peppers

These yummy bell peppers made for a great start to the day.  They were easy to put together, and the leftovers were delicious too. 

If you’re looking for a hearty back-to-school breakfast that relies on fresh garden produce, this is just for you!

Breakfast Stuffed Peppers – Inspired from Mama Nibbles
Serves 2-3

Ingredients

  • 2 red bell peppers
  • 2 strips bacon, cooked
  • 1 tsp. minced onion
  • 1/8 C crushed frozen spinach
  • 1/2 small summer squash
  • 6-8 grape or cherry tomatoes
  • Extra sharp white cheddar cheese, to taste
  • Salt and pepper
  • 2 eggs
  • 1/2 C milk

Directions

Begin by slicing the bell peppers in half and removing the core and seeds.  Place bell peppers onto a lightly greased, and tinfoil lined cookie sheet, open side up. 

Quarter half of a summer squash and slice the grape tomatoes into rounds.  Combine in a microwave safe bowl and season with salt, pepper and minced onion.  Microwave on high for 1 minute, stir and microwave for 30 seconds more. 

Meanwhile, chop up the cooked bacon and divide it evenly between the four bell pepper halves. Sprinkle some cheese on top.  Divide 1/8 C frozen chopped spinach among the bell peppers as well. 

Fill the bell peppers with the squash and tomato mixture.  You’ll want to make sure the bell peppers are nice and level, so use little balls of tinfoil, if needed, to level out the peppers.  This will help prevent run-off in the next step.

Whip the eggs and mix in 1/2 C milk.  Season with salt and pepper. 

Pour about 1/4 C of the egg mixture into each bell pepper.  Top with additional cheese. 

Bake at 375 for 25 minutes. 

Serve warm. 

Enjoy!

Monday, March 18, 2013

Loaded Baked Potato Dip w/ Potato Dippers!

March in my life used to be synonymous with the start of the synchronized swimming season and I honestly never cared about basketball. 

Then, I met and married Frog Prince. 

As our pastor stated this weekend – marriage is 10% compatibility, 90% work.  Part of that 90% work for me was learning to enjoy basketball. 

I believe that was largely helped by living in Green & White territory for 5 years while a grad student at Michigan State University. 

Now, March rolls around and I know what’s coming.  We’re rooting for the Spartans and the Syracuse Orange from here until the end. 

Necessity during March Madness? Good food, of course!  Last year it was Pizza Dip. 

This year, loaded baked potato dip with potato dippers!  Perfect addition to any game. 

Loaded Baked Potato Dip with Potato Dippers – Adapted from BHG

Ingredients

  • 6 oz. Neufchatel cream cheese
  • 1 heaping cup diced broccoli florets
  • 2 T cooked, crumbled bacon
  • 1/2 C finely chopped spinach
  • 1 T minced onion
  • 1/2 C extra sharp cheddar cheese
  • 2 T salsa, if desired
  • 6-8 Russet potatoes, washed & unpeeled
  • Salt & Pepper, to taste
  • Olive oil spray

Directions

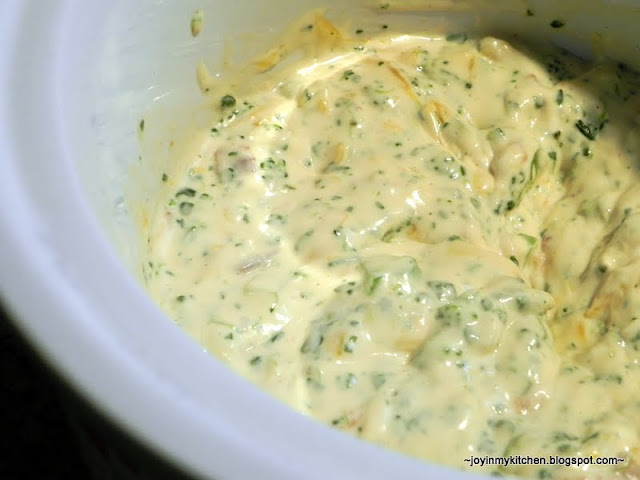
Cube up the cream cheese and place that into a small crockpot. 

Add in 1 C (heaping) diced, steamed broccoli florets. 

Sprinkle in 1 T minced onion, 1/2 C finely chopped spinach (we used frozen), 2 T crumbled cooked bacon and stir well. 

If desired add in 2 T salsa. 

Turn on the crockpot to low/medium and heat for 1 hour until cream cheese is melted, stirring occasionally. 

Stir in cheddar cheese.  Then, reduce the heat to low or “keep warm”; your cheese dip is ready. 
About 40 minutes before you are ready to enjoy your appetizers, use a mandolin slicer (watch those fingers!) and thinly slice the potatoes lengthwise into thin slices. 

Place the potatoes onto a cookie sheet covered in tinfoil (trust me, they will come off much better on the tinfoil than just the cookie sheet).  Spray the tinfoil with olive oil and then layer the potatoes over the top, watching to make sure there are not overlapping potatoes. 

Spray with olive oil and season with salt and pepper. 

Bake at 450 degrees for 25-35 minutes until potatoes are lightly browned and crunchy. 

Use the potatoes as a dipper for the loaded baked potato dip! 

Go Green! 

Wednesday, January 23, 2013

Ingredient Spotlight: Bacon

Today for Ingredient Spotlight, Tiffany is hosting BACON-FEST!  You know you enjoy a good strip of bacon now and again – so go check out some amazing recipes. 

A few of our favorite bacon recipes include:

Breakfast Pizza
Get the recipe here.

Breakfast “Hot Pockets”
Get the recipe here.

Christmas Eggs
Get the recipe here. 

Bacon & Egg Grilled Cheese
Get the recipe here.

Cheddar Chicken & Rice Soup
Get the recipe here.

Olive Garden Zuppa Tuscana Soup
Get the recipe here.

Bacon-Wrapped Turkey
{works for chicken too!}
Get the recipe here.

Cheesy Bacon & Brown Rice Casserole
Get the recipe here.

Baked Potato Pizza
Get the recipe here.

and, Smothered Aussie Chicken
Get the recipe here. 

Now, go, off to link up your bacon recipes, or find some new ones!  You can find the linky here. 

Related Posts Plugin for WordPress, Blogger...